Showing posts with label Axis. Show all posts

Ohm Rice

I wanted something simple and different to do with ground Axis and rice tonight. I was Googling for ground beef and rice recipes when I found Ohm Rice at Recipezaar.com. I changed it up to suit our love for peppers and spices! The recipe in the link is a bit bland as is, but I gave it a five star rating. It's just so good and so simple. And easily changed to suit your own tastes. I now have this wonderfully simple Korean recipe to add to my repertoire. I'll be cooking this a lot--especially for guests as it's so inexpensive and different! The leftovers are obviously going to heat up extremely well, I can't wait to heat some up in the morning and fry an egg to put on it. Mmmm.

This recipe is so cheap, fast, and tasty I can't even begin to express my complete joy in finding it! In fact, I'm so eager to blog it that my freshly prepared bowl of Ohm Rice is sitting on the counter with only three bites eaten out of it. Hubby ate one of those bites and gave it two thumbs up before he dashed off to the studio. Although he had several bites before the egg was added--he was helping me season it. By the way, Ohm Rice does not taste like your average ground beef recipe! It's so good you'd think it couldn't possibly have something so mundane as ground meat in it. I actually detest cooked carrots but don't even notice them in this dish.

It's a good dish for chopsticks, which is how we eat all our Asian dishes. The fork you see in the images way below was used only for taste testing and to cut the egg open for the camera--fat lot of good it did me visually. The ingredients seem (mostly) so American that I nearly forgot it was an Asian dish and grabbed the chopsticks only at the very end.

No, runny egg yolk is not gross. It's bursting with delicious texture, and flavor and enhances a dish like this amazingly well. Think of thick, yellow, warm egg yolk as a rich and exotic sauce.

I do wish I'd had green onions instead of plain onions for this dish, I think it would have been tasty and more attractive. I'd have kept the chopped green tops separate and added them toward the end so they would have retained their color and crunch. Heck, even just having a few chopped green onion tops to add at the end of this exact recipe would have been fine.

Ingredients:


1 lb ground beef, pork, turkey, or venison. I used ground Axis
1 large potato, grated
2 large carrots, grated
1/2 a large onion, chopped
3 Kung Pao peppers, chopped (if available) -- if not, substitute 1 tsp. crushed red pepper or more to taste
1 tsp. honey
2 minced garlic cloves or 1/2 tsp. garlic powder
Instead of the above two ingredients, I used about 1/4 tsp. of My Beloved Garlic Honey and minced one of the Garlic Honey Pickles in addition to a few unmeasured dashes of garlic powder. The recipe really did need just a touch of sweetness and a little garlic!
4 TBS soy sauce (more if needed for taste and for liquid)
2 TBS Olive oil or fire oil because it will be threatening to stick to your pan if you don't add oil.
salt
1 cup uncooked Jasmine rice if you have it, if not, just use your favorite rice.
1 egg per serving

Directions:
Cook rice according to package directions or in your rice cooker--when done set aside until ready to use.

Cook ground meat until just over halfway done, drain off excess fat and liquid, then add grated vegetables, garlic, honey, peppers, soy sauce, the oil, and 1/2 tsp. salt. Cook this mixture until onions are soft and potatoes seem done. The vegetables should not be mush. Please don't overcook!

Mix rice in to dish and stir well. Taste and see if you need a bit more salt and/or soy sauce.

Put mixture into as many bowls or onto as many plates as people you will be serving and fry eggs in butter for each individual serving, putting a fried egg on top of each serving. I prefer mine rather runny but others may not. Another option is to make individual, one-egg omelets for each serving. The omelets should be flat, open, and unstuffed with anything. Garnishing with a bit of chopped green onion would be very attractive. Once served, the eater would chop their egg up a bit and stir it into the dish to eat. I've also seen this dish (online) served wrapped inside an omelet and covered in ketchup. All I can say about that is, ew! But to each her own, yo.

This dish reminds me a lot of really good fried rice, although the potato adds a new and filling dimension!

Below is the photo journal of this dish. I was too hungry to cook another egg and try to make it prettier for the photos. It was plenty tasty all the same! And this isn't the pretties dish anyway, but it's definitely homecooking, Korean style. At the very bottom is a little tutorial on how to chop an onion for those of you who don't watch the Food Network.


Images will enlarge when clicked.


How To Chop An Onion:


The trick to chopping an onion is to cut it in half lengthwise and leave the big, gnarly end intact on each half, cutting off the smoother ends only if needed and peeling the onion. Long slices aimed more or less towards the core of the onion, going from tip to tip of your onion half (without cutting into the gnarly end), are the next step. Then slice across your longitudinal cuts, thinner for more finely chopped onions and wider for more coarsely chopped. This is as simple and fast as it gets without a fancy onion chopper. Leaving the big, ugly end in place holds everything together while you chop and allows you to waste none of your onion. By the way, I chop, slice, and dice as much as possible on heavy-duty paper plates. It's probably not very "green" but I don't have the energy for endlessly washing cutting boards. I also don't have enough cutting boards! I figure I am saving water by using paper plates so maybe it all works out in the end.

If it matters, we very rarely eat on paper plates. I like a real plate when I chow down!

Click here for the slightly easier to print version of Ohm Rice.

Mom's Enchilada Casserole

No, this recipe does NOT require that you make your own corn tortillas.

I am not adept (yet) at corn tortillas so in the interest of honing that skill, I made my second batch ever of corn tortillas today with the intent of using them in Mom's Enchilada Casserole (see recipe below). My tortillas aren't yet good enough to simply fill with delicious taco ingredients and enjoy fresh or to smear with butter while still warm. But for enchiladas they're more than serviceable. I think my tortilla press doesn't quite squish the masa flat enough. Or, perhaps, I just need to practice a lot more.

Normally, I would just use store bought corn tortillas for enchilada casserole--but, like I said, I needed the practice. And since I'm no Tortilla Wizard, I won't drag you through the written instructions on how I make them until I get it perfect. Following are just some photos of the process--there are a multitude of recipes and suggestions online.


I have learned a few things about making tortillas--they need to be kneaded for at least three minutes. I keep intending to knead them for five minutes but my arm wears out.

If I don't knead them for a few minutes, they simply don't cook up as well.


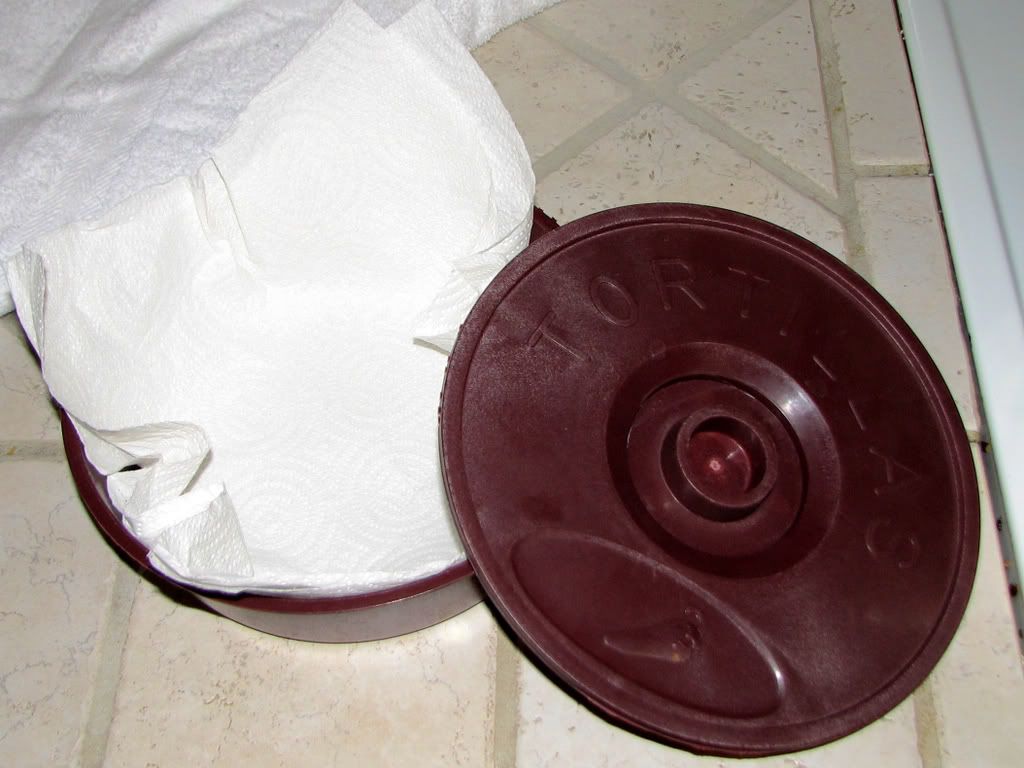
Another trick I've learned is that tortillas are not done until they've sat and steamed for at least a couple of minutes. A tortilla warmer is a must. It can turn the stiffest tort cooked by the most ignorant tortilla cooking noob into a soft, pliable, useful food item. Putting warm tortillas in a tortilla warmer with some paper towel on the bottom to absorb excess moisture and closing the lid allows the cooked tortillas to steam perfectly.

Now, if you are going to make the following recipe, I suggest you use store bought corn tortillas and either warm them up wrapped in paper towel in a tortilla warmer (make sure yours is microwaveable) for one minute or warm them in very hot oil. Personally, I don't find that dunking them in hot oil improves the flavor at all. Steaming them in the warmer makes them pliable enough for rolling, and dipping them in the warm or hot enchilada sauce improves that even more.

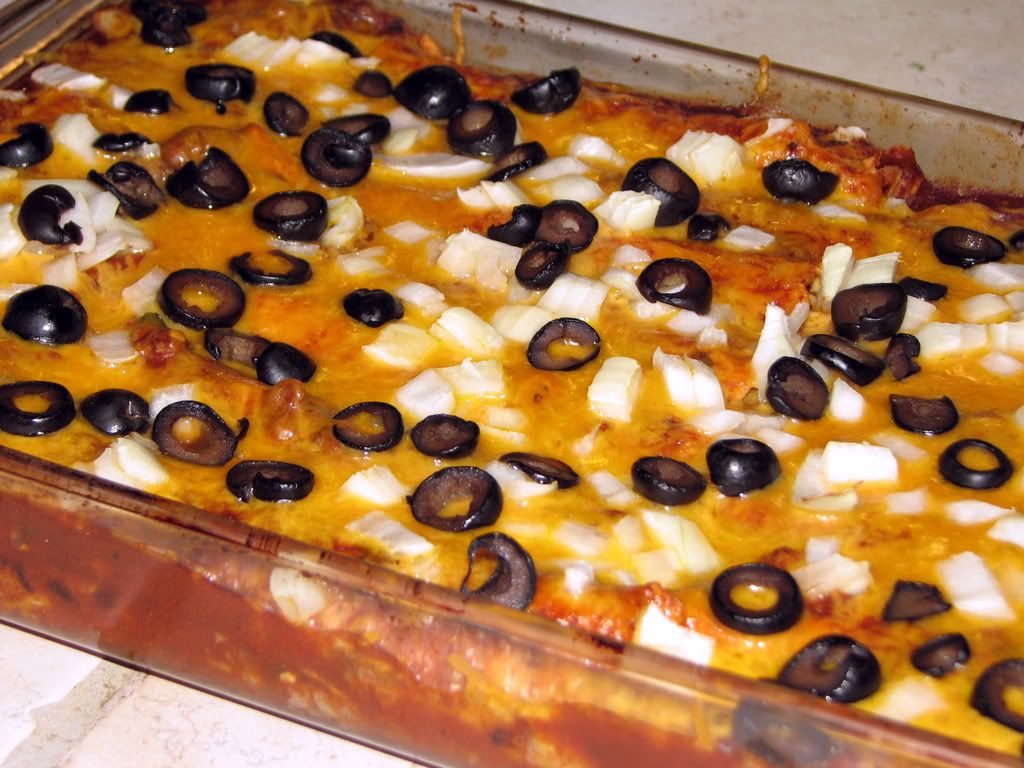
This recipe assumes that you are using a 9x13 baking dish. It's the closest approximation I can get to the way my Mom made enchiladas. These are my all time, favorite enchiladas. We used ground Axis meat instead of hamburger for this recipe, not that we can taste the difference.

Ingredients:

Preheat oven to 350 degrees
1 to 1.5 lbs. lean ground beef, turkey, pork, or venison
Half a large onion, chopped--reserve enough chopped onion to sprinkle on top of casserole
2 jalapenos for spicy enchiladas or 1 for mild. Cut off stem and chop, do not remove seeds.
Approximately 12 oz. grated cheddar
15 to18 corn tortillas depending on size
1 batch of Killer Enchilada Sauce
Enough sliced black olives to sprinkle on top of casserole

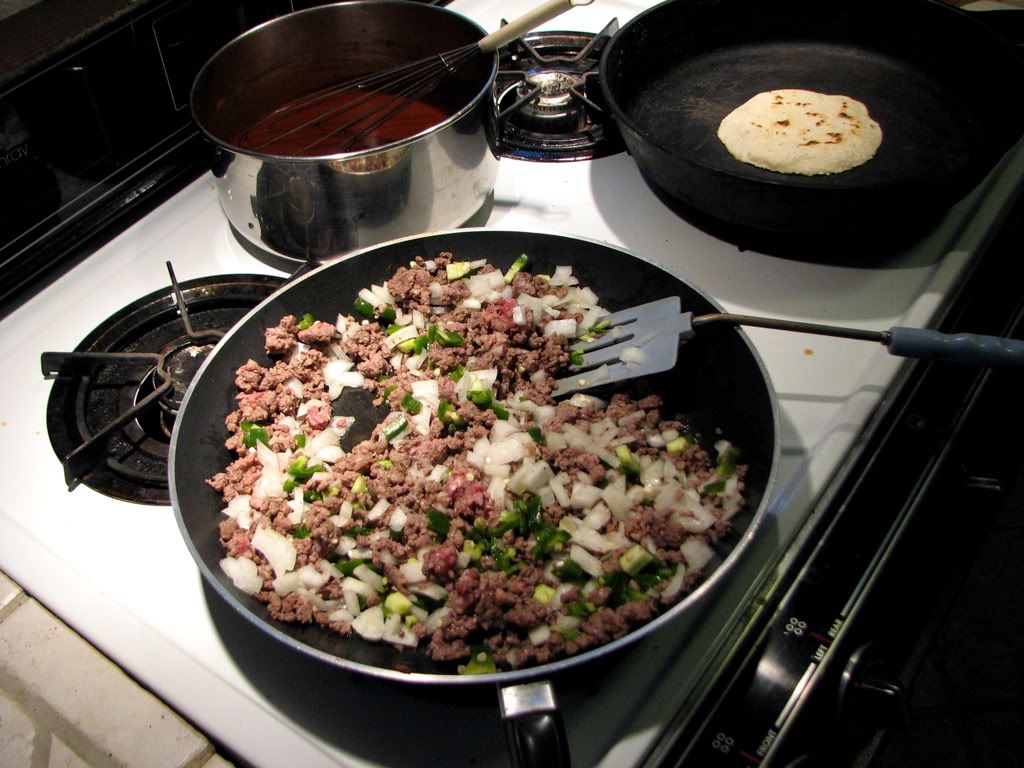
Cook ground meat until it is about half done or so--but not completely done, then drain off excess fat and liquid. Add almost all of the chopped onions, except for what you've reserved to sprinkle on top, and all of the chopped peppers. Sprinkle in a bit of salt if you like. Saute until meat is completely done and onions are tender. The fat melts off ground meat well before it's done and you won't find that anymore needs to be drained off after the vegetables are cooked.

Doing it this way allows my onions and peppers to cook with the meat without my having to pour off half their flavor when I drain the fat from the meat. It probably doesn't REALLY matter if you saute your onions and peppers separately and add them to the meat after it's done or if you add them to the meat after it's cooked and drained and then saute the whole mess until the veggies are done. But something inside me says the veggies and the meat need to cook together so that's what I do.

Once cooked, set meat aside. Your enchilada sauce should at least be warm, if not hot. So warm it if necessary. You will use all but about 2/3's cup of the sauce. Take that out now, if you like, so you don't forget.

Warm tortillas as suggested above the ingredients list and set aside in tortilla warmer to keep them warm, moist, and pliable.

Get ready to get dirty, this is a messy process.

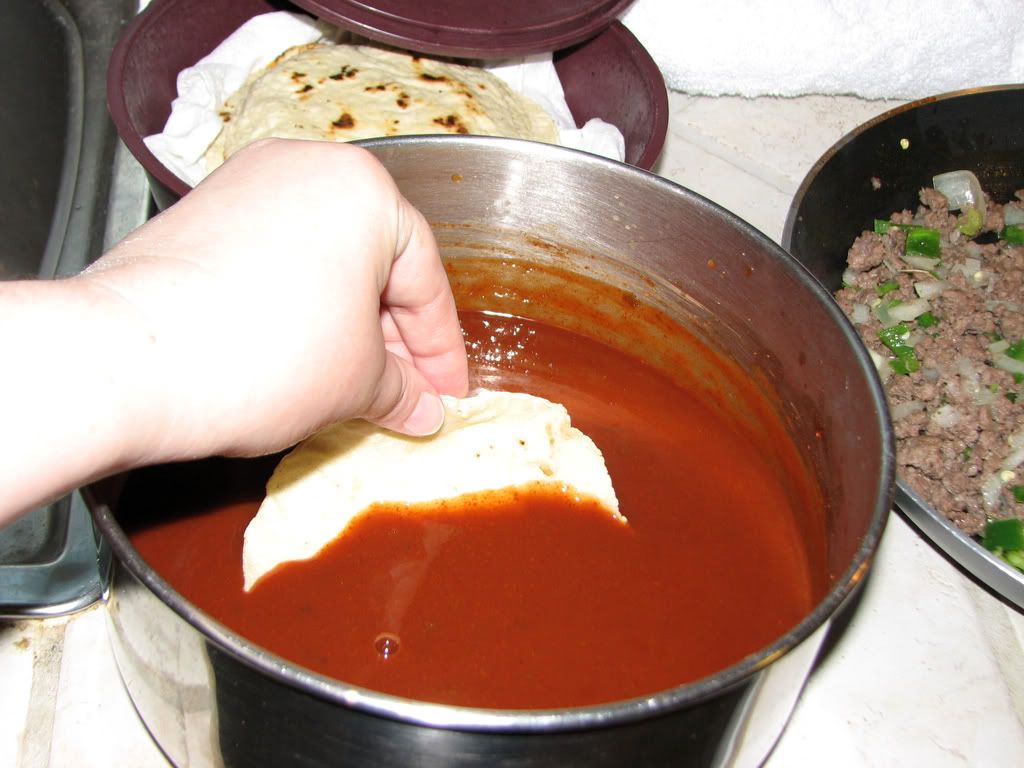
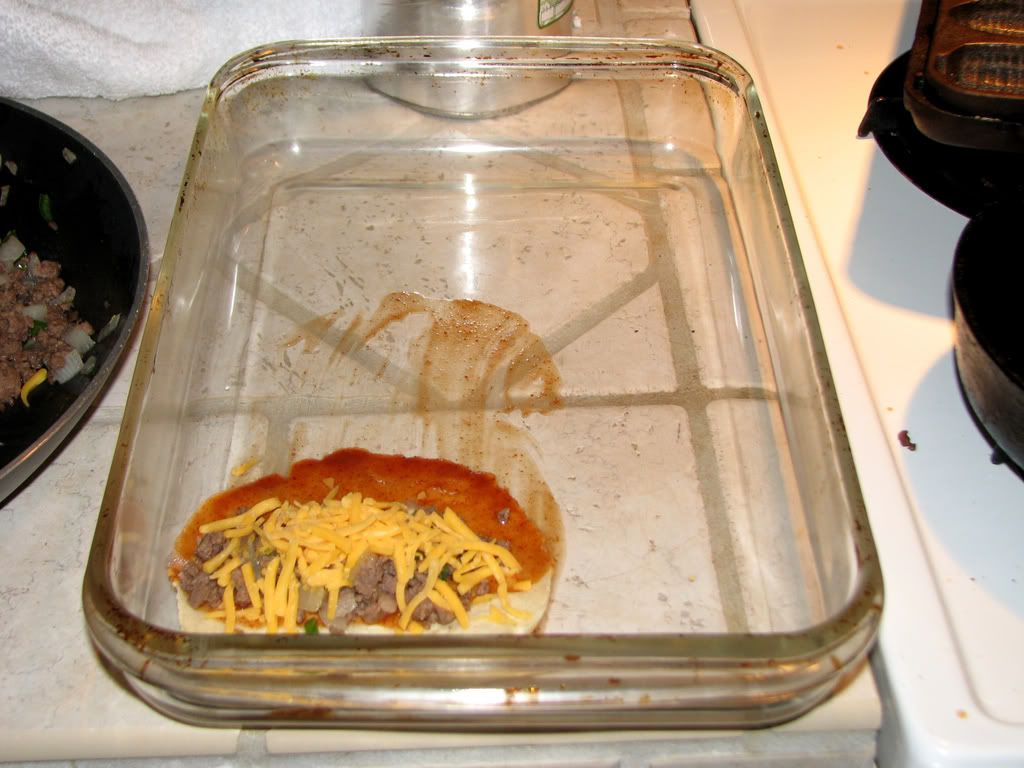
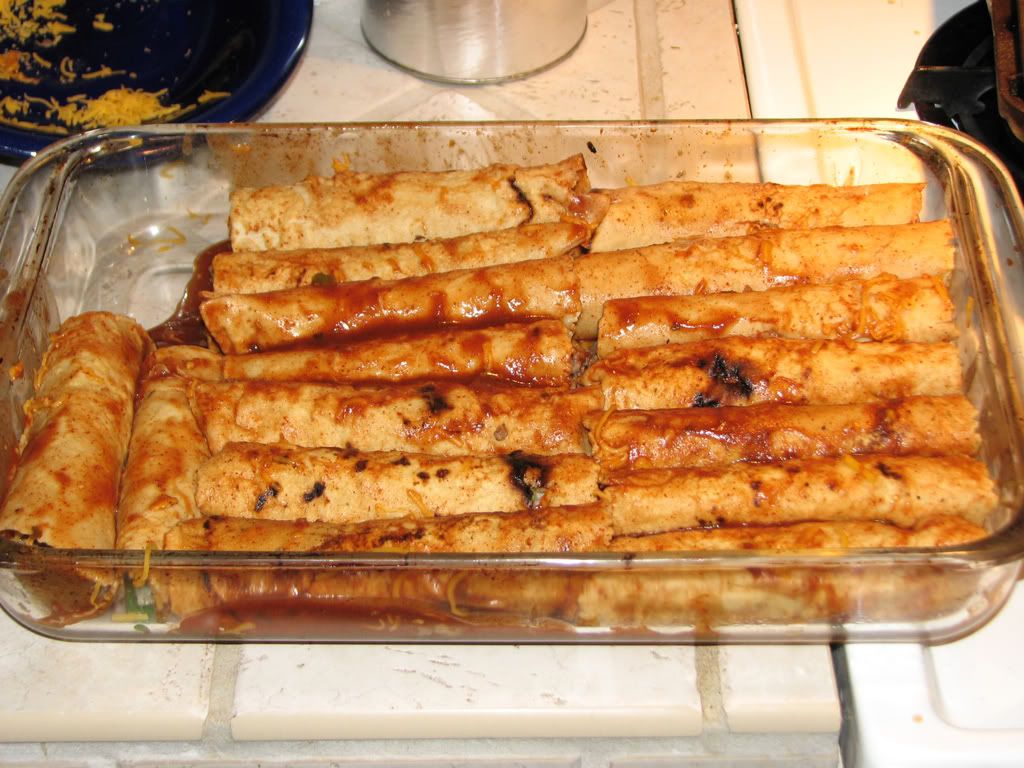
One at a time, dip a tortilla in the sauce to coat the entire tortilla. In the image below I only dipped most of it, but I was trying to keep from getting too dirty while I took photos of this process. After tortilla is dipped, lay it in your baking pan and put a bit of the meat mixture and a little bit of cheese in the tortilla and roll it up. Don't be tempted to over-stuff tortillas, you need to be able to roll them. Also, you don't want to run out of meat. Roll tortilla and start with the next and keep going until you have a pan full of meat and cheese stuffed tortilla rolls.

As you can see below I started rolling them in the pan one way and then realized I needed to lay them out in the pan differently. Oh well. In addition to that boo boo, I was desperately hoping that 16 tortillas would be enough but it wasn't and at the last minute I had to whip up two more. The maseca bag actually has a recipe for just four tortillas, so I didn't have to do any math in my head. The extras took almost no time at all to make--probably since everything was still sitting out!

My homemade tortillas are a bit smaller than store bought tortillas so you may find that 15 store bought tortillas are enough. You'll just have to figure that one out on your own!

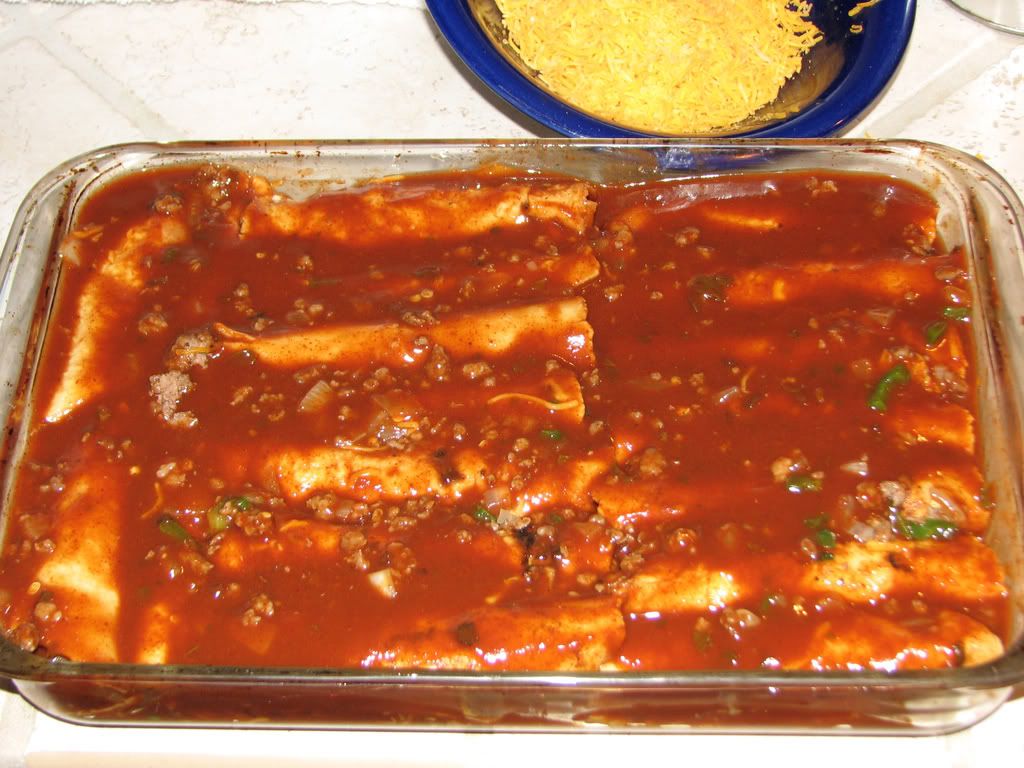
Once your pan is full, don't fret if you have leftover meat, just sprinkle it over the rolled enchiladas. Then pour the enchilada sauce (all but that 2/3's of a cup) over the enchiladas and spread it evenly over the top of the casserole with a spatula or your hand. If you think it needs more, add the rest, but mushy enchiladas are not pretty on a plate so don't use too much. Besides, the extra sauce can probably be used for a little snack the next day!

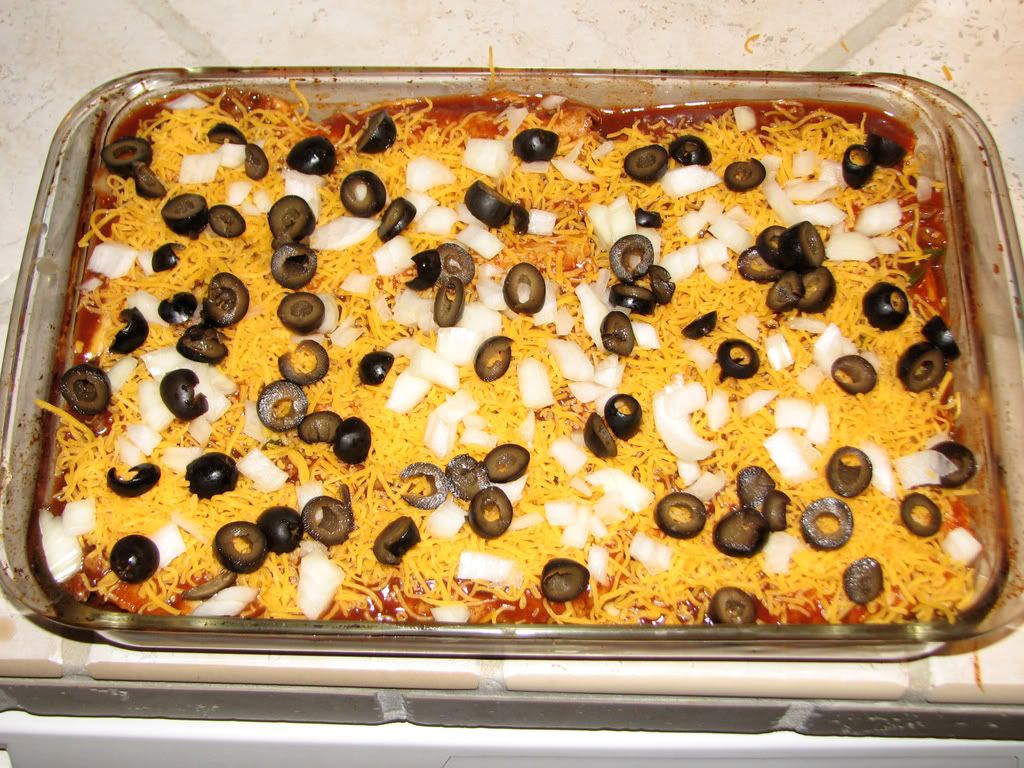
Now sprinkle enchiladas with remaining cheese, adding more if you wish. Sprinkle remaining onions over the top of the cheese and then sprinkle with sliced olives.

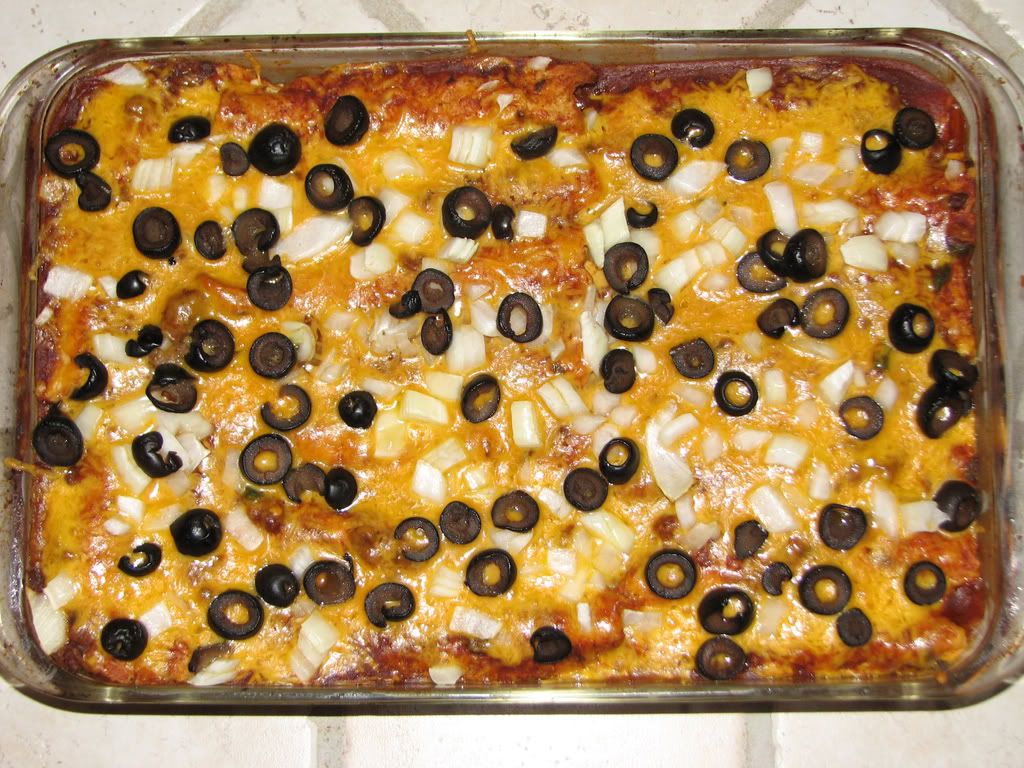
Bake uncovered in a 350 degree oven for 30 minutes or until cheese is melted and sauce is beginning to bubble.

Serve and enjoy!

Cooking Without A Camera -- Canned Axis

It's certainly faster to cook without my camera, but oh how I wish I could show you photos of the processes I describe. My photos tend to be more concise and make more sense than I am or do! Ah, well, my camera will get repaired eventually.

Today I updated my Stir Fry Recipe because I learned an awesome trick that gets me a much better sear on the meat used in the recipe. All this time I thought I couldn't get a good sear because I simply couldn't get my wok or pan hot enough, which I can't, but I found a way around this issue and thought you might benefit from it as well.

What I'm excited about today, however, is that I'm canning venison again! Woot! It's not much, 3.75 pounds that turned out to be just enough to fill three quart jars, but I love having canned venison in the pantry and I fully intend to can much more next time hubby takes a deer. A side benefit of canning venison is that it means less of my limited freezer space being taken up by packages of frozen meat.

I don't like White Tail Deer meat. Never have. It's too gamey for me and I can't eat it. I didn't grow up eating it and never developed a liking for it. But this.... this is Axis! And Axis is certainly a little gamey, but not like White Tail. Axis is delicious. And it's amazing canned! The gaminess of the Axis disappears when I can it. I use a *hot pack and can it in homemade Venison Stock or Beef Stock. It can, however, be canned in tomato juice. I'm eager to try canning White Tail in tomato juice to see if it's more palatable to me. I have yet to try canning White Tail at all and for all I know I may discover that the canning process helps enough with the gaminess of it that I can eat it no matter what kind of liquid I can it in.

Canned venison looks disgusting. All canned meat looks disgusting if it's canned in a glass jar. Canned tuna would look just as horrible if Bumblebee or StarKist used glass jars. But canned venison doesn't taste anything like it looks. It's tender and wonderful and has many delicious uses--as does the broth it's canned in. You know the texture of really tender brisket? That's what canned venison does, but without the grease, fat and smoky flavor.

Add it to stir-fry and use the broth as a base for your sauce as well as part of the liquid to used to cook your rice in.

Add it to a rich brown gravy that you've made using the broth it's canned in and serve it up like you would pot roast or pour it over noodles or rice.

Add it to barbecue sauce and serve it on bread or buns.

Mix it with mayo and minced onions and make and serve it like you would tuna fish or chicken salad. I hear rabbit is good served this way, I've never tried it though.

Throw it on a sandwich.

Crumble it over Top Ramen noodles.

Use it in anything you'd use shredded beef in or anything you'd use leftover roast in.

Season the meat with taco seasoning and cooked onions and serve it in tacos or in a wrap.

Combine with seasonings and refried beans for burritos.

Add to stock and vegetables for a nearly instant soup or stew.

Use it in any casserole that you'd normally use beef in.

Season and use in empanadas.

Use meat and broth to make your stroganoff!

To sum up, canned venison is very tasty and fills up your pantry, not your freezer. This is a big plus for the spouse of a hunter! It's also a great way to utilize all those stray pieces of perfectly good venison meat that aren't quite right for steaks. Yes, you could grind them into burger meat, but once you taste this you may not want to grind up quite so much of your deer meat every year.

*Raw packed Axis is still quite tasty but very unappetizing to look at once it's canned because you don't add liquid to the meat when you raw pack it so, as the meat cooks down in your pressure cooker/canner, you are left with a lot of space in the jar and some rather hideous looking liquid. I much prefer the hot pack and broth. It's still ugly, but not nearly so ugly. And it's definitely practical to have the venison or beef stock right there with the meat when you open the jar.

A key to flavor in low budget cooking

Stock. Chicken stock, turkey stock, venison stock, beef stock, fish stock, or vegetable stock. STOCK STOCK STOCK! My kitchen wouldn't be complete without it. Stock and broth are two different things, by the way. This blog entry is about STOCK!

I have yet to master vegetable stock or even touch on fish stock, so I'm not going to talk about those. Chicken and turkey stocks are my favorite and I use them almost exclusively.

I used to put celery in all my stocks 'cuz everybody said to but I don't always want my stock to taste like soup so I stopped doing it. If you are making your stock specifically for soup, then be free with the celery and don't forget to add some celery leaves as well--they contain lots of flavor. For me, the ideal all-around stock contains few ingredients. This stock can become the can't-cook-without-it base for your soup, your secret ingredient for sauce (I use it in Asian sauces and in plain ol' gravy), or diluted with water to cook noodles in or to use in the best rice ever made. And if you're making congee (oh so easy and oh so good), you must have stock.

If you make a whole chicken or turkey, be sure and save those bones in the freezer for future use!

Chicken/Turkey Stock:

Chicken or turkey bones--I prefer to use two chicken carcasses but maybe that's because I always make such a big batch of stock. One turkey carcass is always enough.
Two or three cups of white wine if you have it
One large onion, halved. I prefer to use the peel although some people say it can make your stock bitter (I can't tell that it does this)--I do cut off the big gnarly end--mostly out of habit.
Several cloves of garlic, mashed, but still in skin.
5 to 10 black peppercorns, or to taste. Just throwing in a teaspoon of pepper or more to taste is fine too. I don't like a lot of black pepper myself
2 to 3 teaspoons of salt depending on your preferences
Dried or fresh parsley if you have it. A lot.
Save your leek tops in the freezer to throw into stocks, you won't be sorry. Or toss in some green onions if you have some extra in the fridge.
Poke around the fridge and feel free to toss in some stray veggie here or there just to see what happens--turnips, squash, some herbs, or even an apple or pear.

I limit what I put in my stock so I can use it in various recipes without being stuck with a flavor in there that I don't want--I can always add tomatoes, carrots, celery or whatever I want to the recipe I am using the stock in if I want to.

Cover your bones, veggies, and spices well with water and bring to boil then simmer for at least three hours. Once done, strain it well through a colander or sieve, then place in fridge overnight. The next day, the fat will have separated from the stock and hardened and you can just pick it off and throw it away. The more gelatinous your remaining stock is when it is cold, the better you have done. So pat yourself on the back if you have a big bowl of chicken jello. You now have a virtually fat free stock that is plum packed with flavor.

I like to freeze several 1/2 cup and 1 cup packages of stock for sauces. That whole thing with pouring it into an ice tray so you can freeze cubes of it is messy. I just buy the cheapest sealable bags that I can, pour 1 cup into each bag (a canning funnel is very handy here) and then freeze them. Once they are frozen, I stuff as many of them as I can into a gallon size freezer bag. Frozen stock, if not sealed well, will begin to dehydrate in your freezer and, if not stored well, it will just disappear. It needs, ultimately, to be stored in a quality freezer bag or container. You can vacuum seal your stock by pouring it into vacuum bags and setting the bags carefully in the freezer, unsealed. Once they are frozen they can be sealed. It's not really worth the fuss, however.

I also store stock in four cup amounts. It's about the perfect amount for a nice pot of soup--not enough to feed a large family but more than enough for you and one or two others.

Venison Stock Recipe:

Venison makes for such a strong stock that if you are going to do this, you must really like the flavor of wild game. Also, even for the most avid wild game fan, it's better to use a spike or young doe for your stock, older or bigger deer are going to have a stronger "gamey" flavor. This applies to Axis as well as White Tail. Axis stock comes out golden like turkey stock and always tastes lighter and more delicious to me than White Tail stock. Venison stock is delicious and when I can venison meat, I prefer to can it in venison stock.

On to the recipe....

You needs you some deer bones. You can crack rib bones easily with some pliers or a hammer--cracking the bones will make your stock much better. Don't go crazy, a crack here or there is fine. You don't want shards of bones ending up in your stock. If using leg bones, I find that a hammer is the easiest way to break the bones.

Add the bones you are going to use to your stock pot--a rear leg (needs a very large pot) or two front legs or five or six cracked ribs is sufficient for one batch of stock. Depends on you and how strong you like your stock. Making venison stock is really dependent on a very large pot unless you snag some vertebrae and take the time to separate them which is, actually, quite a pain.

1 large onion, halved with skin--big gnarly end removed just in case that's what those chefs are really talking about in regard to bitter stock

Pepper to taste--I prefer peppercorns but ground black pepper will do

Several cloves of garlic, mashed but not skinned

Two cups of red or white wine, I prefer white in venison stock

A whole bunch of fresh parsley or several tablespoons of dried parsley

Add water until it's all covered and refer to Chicken/Turkey Stock recipe above to finish up.

Beef Stock Recipe:

Follow the recipe for Venison Stock but instead of front legs/back legs/etc, use whatever bones you have available. If you happen to see some really cheap ribs at the store, buy them for stock. Or ask the butcher if he has some beef bones back behind the counter. I can't get beef bones from the butcher in my small town so I just buy ribs.

About carrots:

I don't like cooked carrots. And even though they add a nice flavor and wonderful color to just about any stock, I don't use them. Feel free to include a few carrots or parsnips (if you're lucky enough to get any where you live) to any of the stock recipes above. Personally, when using them, I advise not using too many. Carrots are sweet. You may like the sweetness they add to your stock, or you might be like me and just prefer not to go there.

Chef Christopher Allen Tanner On Making Stock--I can't wait to try it his way... by roasting the bones first!

Pico de Gallo

Pico de Gallo
Fresh, cool, delicious.

Anasazi Beans

Anasazi Beans
Dang, that's a pretty bean.

Mom's Beef Enchiladas

Mom's Beef Enchiladas
Except we used ground Axis.

My Solar Cooker

My Solar Cooker
Needs some refinements but it works!